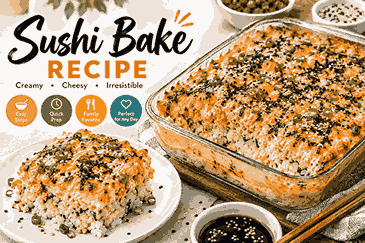
The Best Sushi Bake Recipe for Easy Weeknight Dinners
You crave restaurant-quality sushi but dread the rolling, slicing, and sticky mess. Ordering takeout drains your wallet every single Friday night. This sushi bake recipe solves both problems. You get all the bold flavors of your favorite rolls packed into one creamy, golden casserole that feeds a crowd — no bamboo mat required.
What Is a Sushi Bake Recipe?
A sushi bake recipe takes every element you love about a California roll or spicy salmon roll and layers it into a baking dish. Think seasoned sushi rice on the bottom, a rich protein mixture in the middle, and a torched creamy topping that turns golden under the broiler.
The dish originated in the Philippines around 2019 and spread across social media faster than anyone expected. Home cooks loved it because it removed the most intimidating part of sushi — the rolling.
You eat it by scooping portions onto small sheets of roasted nori. The result tastes exactly like a deconstructed hand roll, warm and comforting straight from the oven.
Why This Sushi Bake Recipe Became a Viral Sensation
People share this sushi bake recipe for one simple reason: it delivers maximum flavor with minimum effort. You skip the precise knife work and the years of practice that traditional sushi demands.
The creamy topping — usually a mix of Kewpie mayo, cream cheese, and sriracha — creates a rich, tangy crust that contrasts beautifully with the seasoned rice underneath. Every bite hits salty, sweet, umami, and spicy notes at once.
It also scales effortlessly. Feeding two people? Use a small dish. Hosting a party of twelve? Double the layers. The flexibility makes this sushi bake recipe a permanent fixture in many households.
Essential Ingredients for the Perfect Sushi Bake Recipe
Getting the right ingredients makes or breaks your sushi bake recipe. Here is exactly what you need and why each component matters.
| Ingredient | Quantity | Purpose | Best Substitution |
| Short-grain sushi rice | 2 cups (uncooked) | Sticky base layer | Calrose medium-grain rice |
| Rice vinegar | 3 tablespoons | Seasons the rice | Apple cider vinegar + pinch of sugar |
| Granulated sugar | 2 tablespoons | Balances rice acidity | Coconut sugar |
| Salt | 1 teaspoon | Enhances overall flavor | Sea salt flakes |
| Fresh salmon fillet | 1 lb (skinless) | Primary protein | Canned salmon or imitation crab |
| Kewpie mayonnaise | ½ cup | Creamy topping base | Regular mayo + dash of rice vinegar |
| Cream cheese | 4 oz (softened) | Adds richness and structure | Mascarpone |
| Sriracha sauce | 2 tablespoons | Heat and color | Gochujang paste (milder) |
| Furikake seasoning | 3 tablespoons | Umami crunch topping | Toasted sesame seeds + crushed nori |
| Roasted nori sheets | 1 pack | Serving vessel | Soy paper wraps |
| Green onions | 2 stalks (sliced) | Fresh garnish | Chives |
| Sesame oil | 1 teaspoon | Depth of flavor | Neutral oil with toasted sesame seeds |
Buy the freshest salmon you can find. The U.S. Food and Drug Administration recommends purchasing fish labeled “sushi-grade” or “sashimi-grade” when the product will receive minimal cooking, though baking at 375°F eliminates most foodborne risks (FDA Seafood Safety Guidelines, 2024).
Step-by-Step Sushi Bake Recipe Instructions
Follow these directions closely, and your sushi bake recipe will come out perfect on the very first try.
Step 1: Cook and Season the Rice
Rinse your sushi rice under cold water until the water runs clear. This removes excess starch and prevents a gummy texture. Cook the rice according to package directions, typically a 1:1.1 rice-to-water ratio.
While the rice steams, warm the rice vinegar, sugar, and salt in a small saucepan. Stir until dissolved. Fold this mixture into the hot rice gently using a wooden spatula. Let it cool slightly.
Step 2: Prepare the Protein Layer
Bake your salmon fillet at 375°F for 12 to 15 minutes until it flakes easily. Let it cool for five minutes, then shred it with two forks into small pieces.
Mix the shredded salmon with two tablespoons of Kewpie mayo, one tablespoon of sriracha, and a teaspoon of sesame oil. Taste and adjust. The mixture should be creamy, slightly spicy, and well-coated.
Step 3: Make the Creamy Topping
Beat the softened cream cheese until smooth. Add the remaining Kewpie mayo and a squeeze of sriracha. Mix until fully combined. This layer creates the signature golden crust that makes every sushi bake recipe irresistible.
Step 4: Assemble the Layers
Preheat your oven to 375°F. Spread the seasoned rice evenly across the bottom of a greased 9×9 baking dish. Press it down firmly with the back of a spoon.
Add the salmon mixture as the second layer. Spread it edge to edge. Spoon the cream cheese topping over the salmon and smooth it out.
Step 5: Bake and Broil
Bake for 15 minutes. Then switch your oven to broil for two to three minutes. Watch it closely. You want the top bubbly and lightly charred, not burnt.
Remove from the oven and sprinkle furikake seasoning and sliced green onions over the top. Serve immediately with nori sheets on the side.
Best Rice to Use in Your Sushi Bake Recipe
Short-grain Japanese rice is non-negotiable for an authentic sushi bake recipe. The high amylopectin starch content gives the rice its characteristic sticky, chewy texture that holds the layers together.
Calrose rice works as a backup. It is a medium-grain variety grown in California that mimics the stickiness of true sushi rice reasonably well. Avoid long-grain varieties like basmati or jasmine. They stay too separate and dry, causing the casserole to crumble when you scoop it.
Rinse your rice at least three times. This single step transforms the final texture more than any other technique in this sushi bake recipe.
Protein Options: Salmon, Tuna, or Crab Sushi Bake Recipe
Salmon remains the most popular choice, but you can swap proteins freely. Each option changes the character of your sushi bake recipe in a distinct way.
- Fresh salmon: Rich, buttery, and flaky. The classic choice.
- Canned tuna: Budget-friendly and pantry-ready. Drain well and mix with extra mayo.
- Imitation crab (surimi): Sweet and mild. Shred it into thin strips for the best texture.
- Cooked shrimp: Chop into small pieces. Adds a pleasant snap to every bite.
- Spicy tofu: Crumble firm tofu and pan-fry with sriracha for a plant-based version.
According to the USDA FoodData Central database, a 3-ounce serving of cooked Atlantic salmon provides roughly 1,210 mg of omega-3 fatty acids, making this sushi bake recipe a genuinely nutritious dinner option (USDA FoodData Central, 2024).
How to Make the Creamy Topping for Any Sushi Bake Recipe
The creamy topping separates a forgettable casserole from an outstanding one. The secret lies in the ratio of fat to acid.
Use two parts Kewpie mayo to one part cream cheese. Kewpie contains egg yolks and rice vinegar, giving it a richer, tangier profile than standard American mayonnaise. This difference matters more than you think.
Add sriracha gradually. Start with one tablespoon, taste, then add more. The topping should have a gentle warmth, not an aggressive burn. A squeeze of fresh lemon juice brightens the entire mixture and cuts through the richness.
Sushi Bake Recipe Serving Suggestions and Nori Pairings
Serve your sushi bake recipe family-style right in the baking dish. Place a stack of roasted nori sheets, a bowl of edamame, and sliced cucumber on the table.
Guests scoop a spoonful of the warm casserole onto a nori sheet, add a strip of cucumber, and fold it into a makeshift hand roll. This interactive eating style makes the meal fun and memorable.
Pair the dish with pickled ginger, wasabi paste, and low-sodium soy sauce for dipping. A cold Japanese lager or crisp sake complements the creamy, spicy flavors beautifully.
Make-Ahead and Storage Tips for Your Sushi Bake Recipe
You can assemble the entire sushi bake recipe up to 24 hours in advance. Layer the rice, protein, and cream cheese topping in the dish, cover tightly with plastic wrap, and refrigerate. When ready to eat, bake for 20 to 25 minutes instead of 15, since the dish starts cold.
Leftovers keep well in an airtight container for up to three days. Reheat individual portions in the microwave for 60 to 90 seconds. The rice may firm up slightly in the fridge, so a splash of water before reheating helps restore the soft texture.
Freezing is not recommended. The cream cheese topping separates and the rice turns grainy after thawing.
Common Mistakes to Avoid When Making a Sushi Bake Recipe
Even a simple sushi bake recipe can go sideways if you overlook a few key details. Here are the most frequent errors and how to dodge them.
- Skipping the rice rinse: Unwashed rice turns the base layer into a starchy paste. Rinse until the water runs clear.
- Overcooking the salmon: Dry, chalky salmon ruins the protein layer. Pull it from the oven the moment it flakes.
- Using cold cream cheese: Lumps form when cream cheese is not fully softened. Leave it on the counter for 30 minutes before mixing.
- Broiling unattended: The topping goes from golden to black in seconds. Stand by the oven and watch.
- Seasoning the rice too early: Add the vinegar mixture while the rice is still hot. Cold rice will not absorb the flavors properly.
Sushi Bake Recipe Nutrition and Calorie Breakdown
A single serving of this sushi bake recipe (approximately one-eighth of a 9×9 dish) contains roughly 380 to 420 calories, depending on your protein choice and mayo brand.
The dish delivers a strong protein punch from the salmon, healthy fats from the Kewpie mayo and sesame oil, and complex carbohydrates from the short-grain rice. The omega-3 content from salmon supports heart and brain health, as noted by the American Heart Association’s dietary recommendations (AHA Fish and Omega-3 Guidelines, 2023).
To lighten the dish, swap half the Kewpie mayo for plain Greek yogurt and use reduced-fat cream cheese. The flavor difference is minimal, and you save roughly 80 calories per serving.
Variations to Customize Your Sushi Bake Recipe
Once you master the basic sushi bake recipe, experiment with these twists to keep dinner exciting.
- Spicy tuna version: Use canned tuna mixed with sriracha and a splash of soy sauce instead of salmon.
- Vegetarian option: Layer roasted sweet potato cubes and avocado with a miso-cream cheese topping.
- Teriyaki chicken: Shred rotisserie chicken and toss it with teriyaki glaze for a kid-friendly take.
- Unagi (eel) bake: Top with broiled eel strips and a drizzle of unagi sauce for a luxurious upgrade.
- Spam musubi style: Dice pan-fried Spam and mix it into the rice layer for a Hawaiian-Japanese fusion dish.
Frequently Asked Questions About This Sushi Bake Recipe
What temperature do you bake a sushi bake recipe?
Set your oven to 375°F (190°C). Bake for 15 minutes, then broil for two to three minutes until the top turns golden and bubbly.
Can I use imitation crab in a sushi bake recipe?
Absolutely. Shred the imitation crab sticks into thin strands and mix them with Kewpie mayo and sriracha. It creates a sweeter, milder flavor profile similar to a California roll.
How long does a sushi bake recipe last in the fridge?
Store leftovers in an airtight container for up to three days. Reheat portions in the microwave with a small splash of water to keep the rice soft.
Is a sushi bake recipe gluten-free?
The base ingredients are naturally gluten-free. However, check your soy sauce and sriracha labels. Swap regular soy sauce for tamari to make the entire dish safe for gluten-free diets.
Can I make a sushi bake recipe without cream cheese?
Yes. Replace the cream cheese with an equal amount of sour cream or mascarpone. The topping will be slightly tangier but still creamy and golden after broiling.
What is the best rice for a sushi bake recipe?
Short-grain Japanese sushi rice delivers the stickiest, most authentic texture. Calrose medium-grain rice is the next best option. Avoid long-grain varieties entirely.
Conclusion
This sushi bake recipe turns a dish that sounds intimidating into the easiest dinner you will make all week. The layers come together in under 20 minutes of active prep, and the oven handles the rest.
Gather your rice, your salmon, and that bottle of Kewpie mayo sitting in your fridge door. Preheat the oven, layer the dish, and watch the topping bubble into golden perfection. Your family will ask for this every single week.
Print the recipe card, share it with a friend who still pays $40 for sushi takeout, and tag your creation online. Once you taste that first warm, creamy, nori-wrapped bite, you will never look at a bamboo rolling mat the same way again.